So you have been thinking about creating a blog website. You find yourself spending hours reading blogs, pinning content and stalking bloggers on line… but you feel like you simply do not have time to figure out how to build a blog yourself (…and you don’t fancy forking out a few thousand to get someone to build one for you.)
What if I told you, you could create your blog website in less than 30 minutes with no technical skills?… If you can drive a mouse – Then you’ve got this!
Stop wasting time thinking about it and start your blog today.
I am going to show you how to build a blog website of your own in 4 simple steps (that anyone with a mouse and an internet connection can do – Fast).
Four Steps to creating your own blog
- Buy hosting – Rent your space on the internet
- Buy a domain name – Name your (baby) blog
- Install wordpress – Add the technology in just a few clicks
- Choose a theme – Make it pretty with beautiful design
1. Buy hosting – Rent your space on the internet
First off you start by renting your very own space on the internet. But don’t worry its much cheaper than buying a house in fact you can host your blog for less than the cost of a coffee per month.
Go to BLUEHOST and press the green GET STARTED NOW button (see the picture)
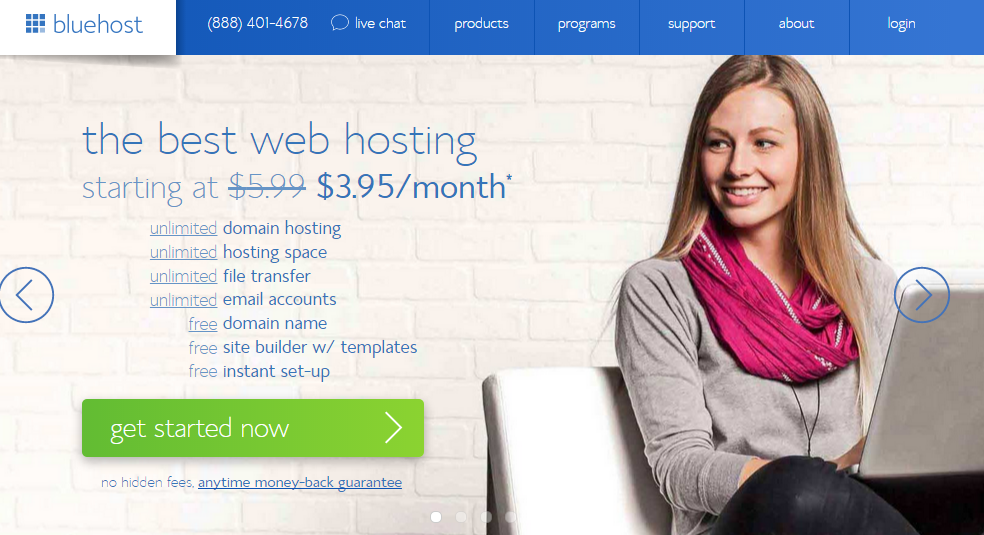
This will take you to a list of plans we recommend starting off the the starter plan which costs less than a cup of coffee a month. It also comes with a free domain name and includes email.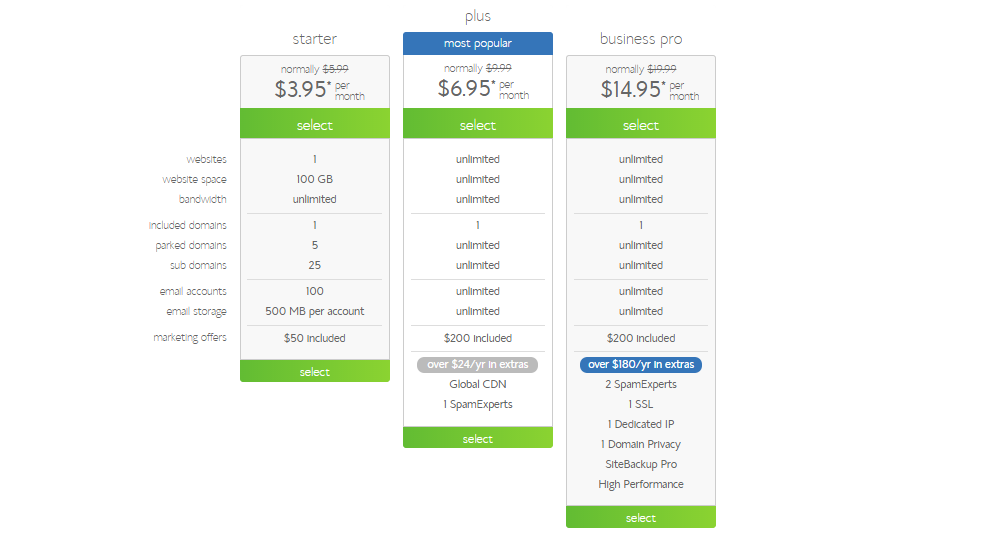
2. Buy a domain name.
It is time to name your new baby blog. Hopefully if you have been toying around with creating a blog, you know what you want your blog to be called. If not – you need to decide this before you can proceed.
Stuck? – Take a blank piece of paper and jot down 10 words that come to mind. See if you can work these into a workable title.
You may need to look for variations of this brand name if your url is already taken. E.g. I chose glutenfreeaussie.com because glutenfreeaustralia.com was taken. Make sure you think about this url and your brand as changing domains can be technical.
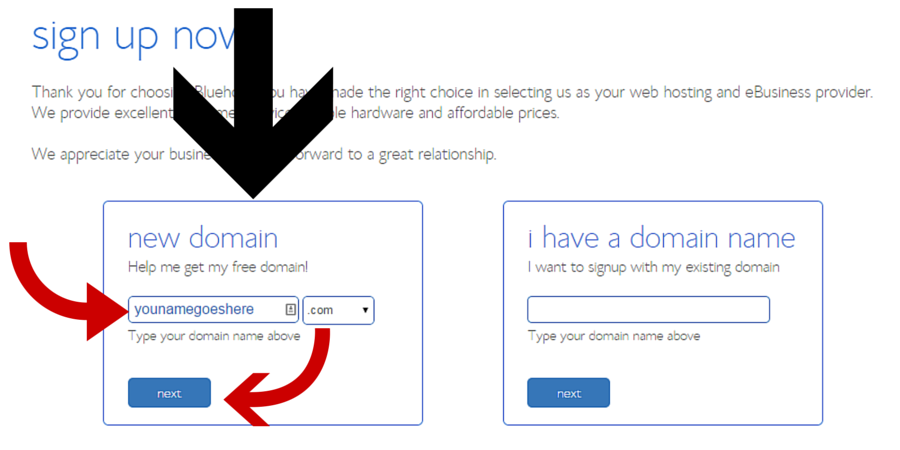
Enter the domain name you would like to use for your blog in the “HELP ME GET MY FREE DOMAIN”. Make sure you check the extension name of your blog e.g. .com or .co (you might have to experiment if the domain is taken by adding the word blog to the end or putting the at the start). Click the “NEXT” Button.
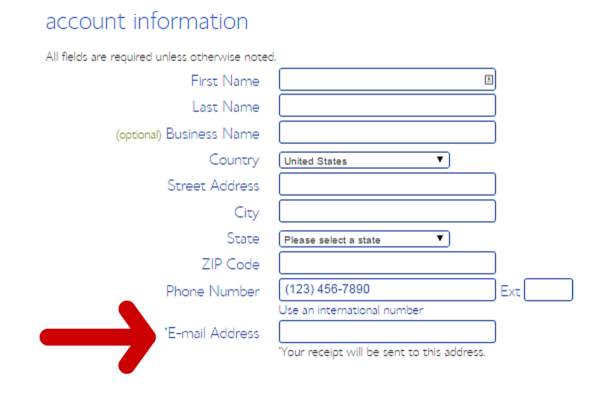 Enter all of your account information. Be sure to double check your email address as they are going to email you some important information like how to logon.
Then you move onto the package information section. Start off by chosing your account plan (the longer you sign up for the cheaper it is). It will automatically try and tick some boxes. I like to untick them all (you can always add them later). You may want to consider adding domain privacy protection (to keep your details safe) its only an extra $1 per month.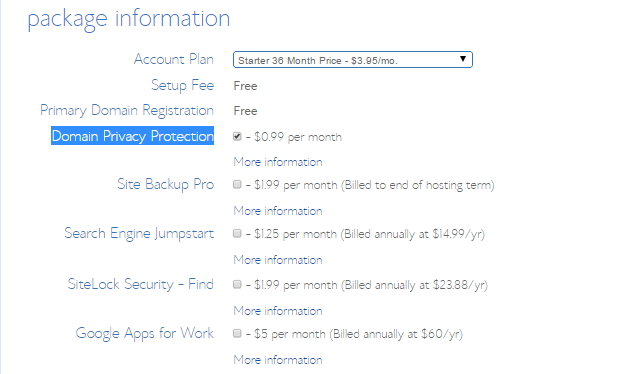
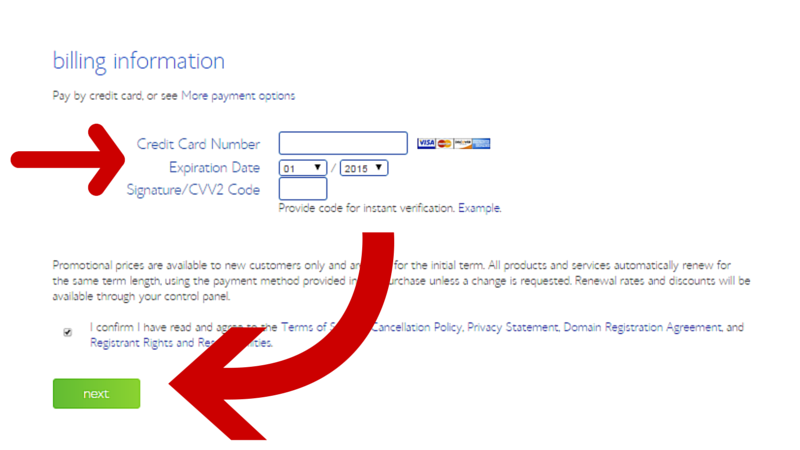
Then its time to enter your billing information. If you have done any online shopping in the past this part should be easy! Then click “NEXT”.
On the next page it will ask you to add upgrades. Skip all of these, you do not need them for now, and you can add them later if you need too. Just continue to finish your purchase and then GO TO YOUR EMAIL INBOX
3. Install wordpress – Add the technology in just a few clicks
BLUEHOST will email you all of the information you need to login to your cpanel. Head to our email and look for your email from them.
Now while this next part might sound nerdy – it is actually really easy and only takes a few clicks. We will walk you through every step.
Login to your BLUEHOST account using the login details from your email
![]()
Once you are logged (there may be a pop up – just close it by pressing the X so you can see the screen underneath)
Click “HOSTING” on the top navigation
Click “INSTALL WORDPRESS” under websites

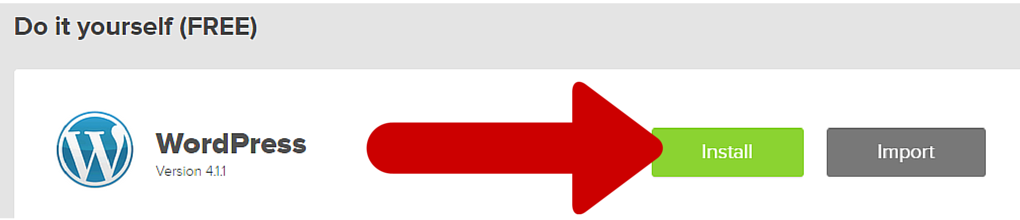
A window will pop up asking you to install wordpress – Click the green “INSTALL” button
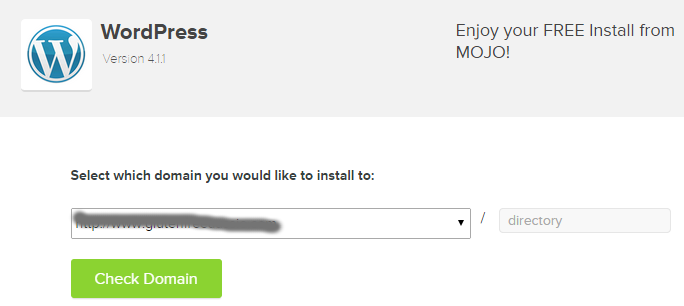
.On the next window just use the defaults (your domain name should populate into this box) and press the green “CHECKDOMAIN” button
On the next page click “SHOW ADVANCED OPTIONS”. Enter
- The name of your blog
- The Username you want to login with
- The Password you want to login with
- A valid email address
- Make sure you check the I have read terms and conditions box
(write these down or snap a photo of them with your cell phone so you have them ready to login)
Then press the green “INSTALL NOW” Button.
CONGRATULATIONS – YOU HAVE A BRAND NEW BABY BLOG!!!
Pretty easy isn’t it. Now its time to login and try out some new styles.
4. Choose a theme – Make it pretty with beautiful design
When it comes to choosing your blog style thing about your personality, or the blogs you like, What colours do they use? what fonts? what imagery. Once you know what you like you can start looking for a template and add graphics to show off your personal style. There are literally thousands of themes for your to choose from. If you are getting started.
Go to your thedomainnameyouhavechosen.com/wp-admin and Use the login details you created in the step above to login.
Head to APPEARANCE > THEMES > on the left hand side
Select the ADD NEW option on the screen
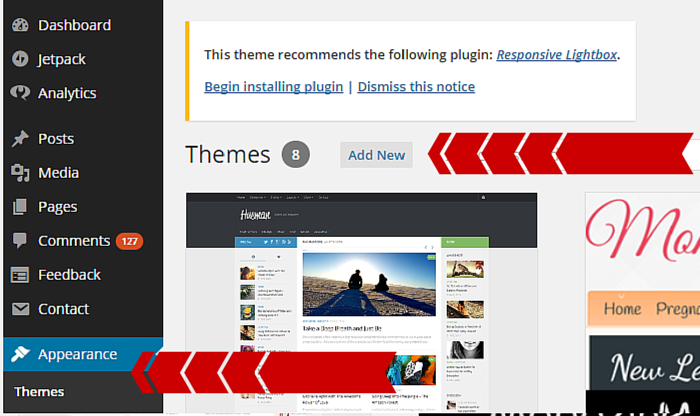
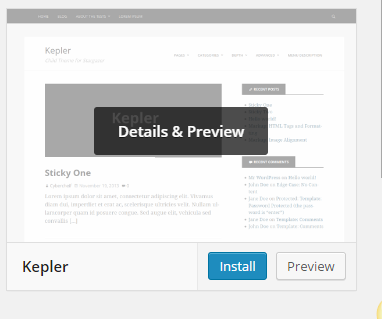
Brows the themes until you find the one for you. Hover over the theme to try it on. And use the “INSTALL” Button to add it to your website.
And that is it – your done – and ready to start blogging.
Got questions? Ask them below? What did you think of this post? I would love to hear from you.